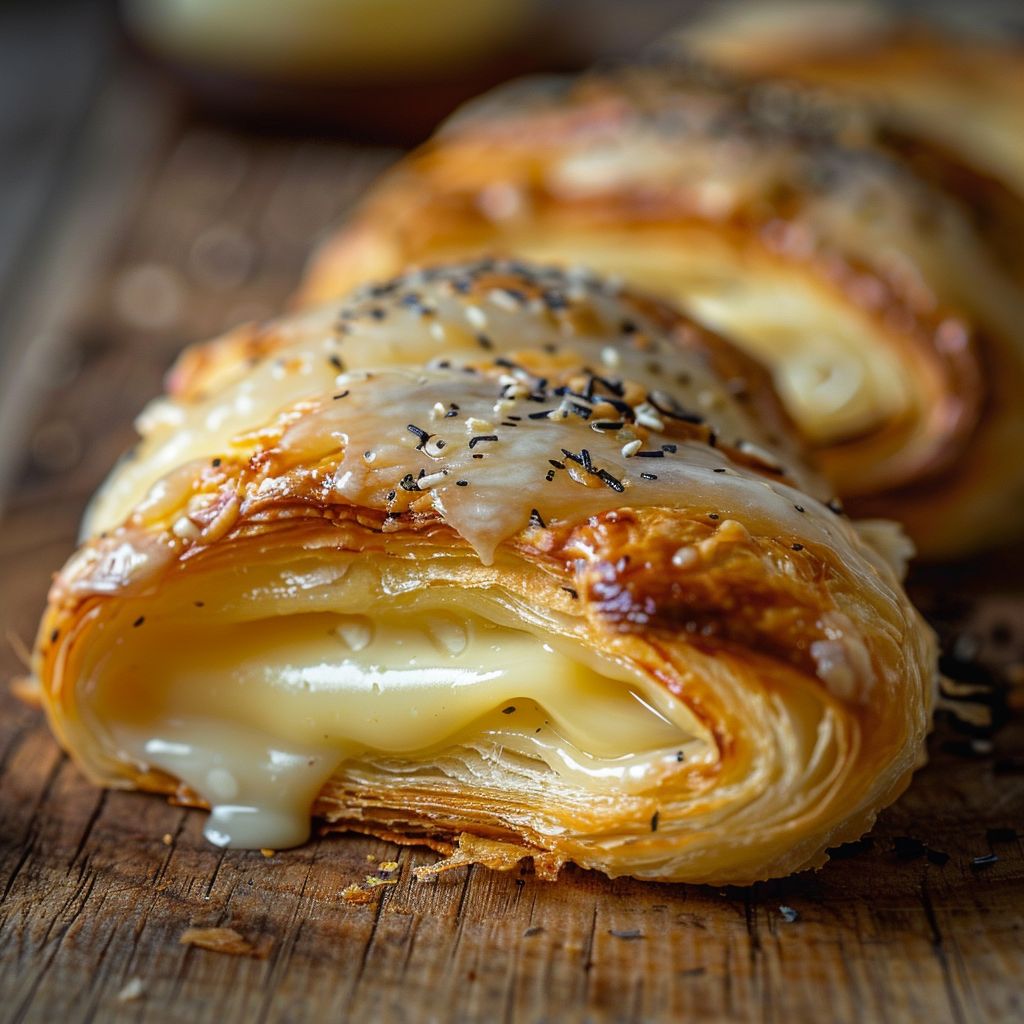
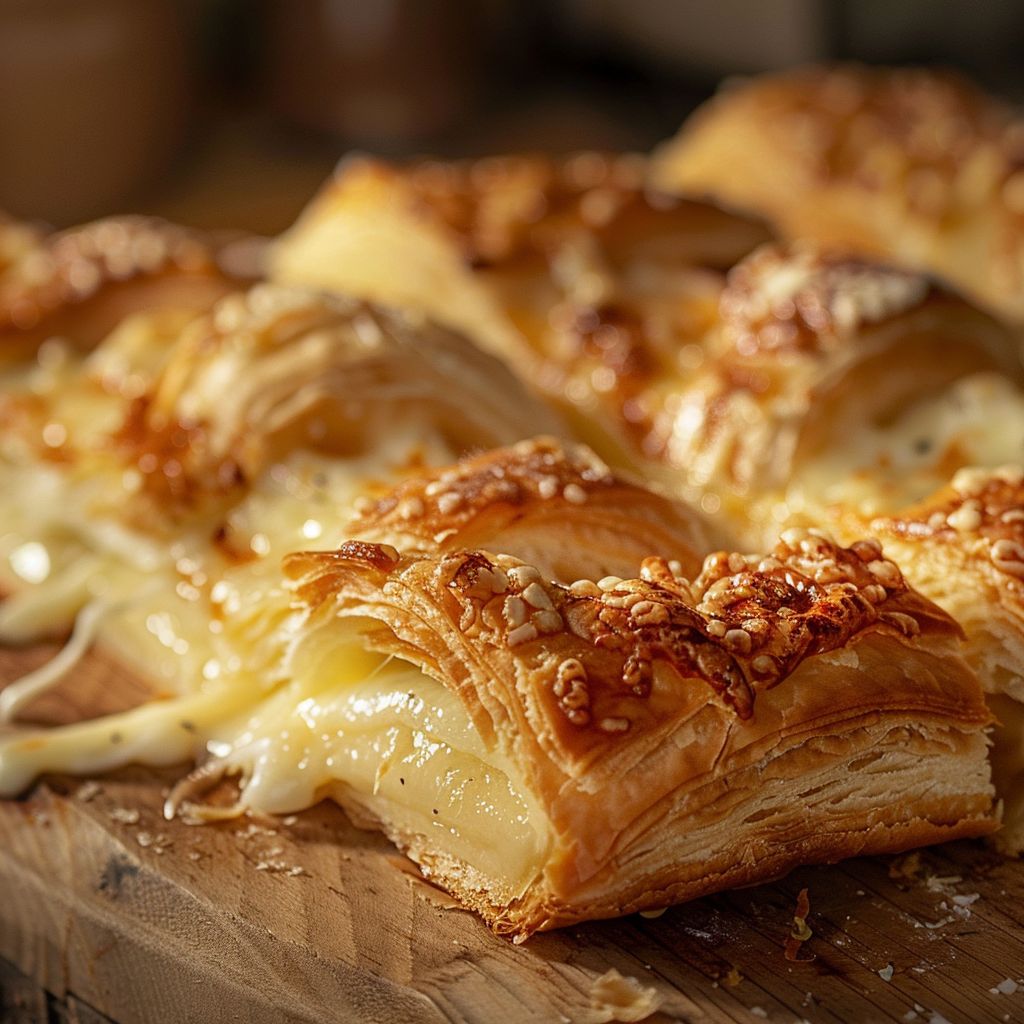
Discover the Magic of Cheese Danishes!
Are you ready to embark on a culinary adventure that will tantalize your taste buds and impress your friends? Cheese Danishes are not just pastries; they’re delightful bites of flaky goodness filled with creamy cheese that can elevate any breakfast or snack time to a whole new level! Whether you’re a seasoned chef or just starting, this easy-to-follow Cheese Danish recipe will have you baking like a pro in no time. Let’s dive into this delicious journey together!
Why You’ll Love This Recipe
- Flaky perfection: The buttery layers of pastry provide a flaky texture that melts in your mouth, making each bite a heavenly experience.
- Customizable fillings: While this recipe features a cream cheese filling, feel free to mix it up with fruits, jams, or even chocolate to make it your own!
- Quick and easy: With just 10 minutes of prep time and 15-20 minutes of baking, you can whip up these pastries in no time.
- Perfect for sharing: These cheese danishes are crowd-pleasers, making them ideal for brunches, holiday gatherings, or just a cozy morning at home.
- Social media worthy: Their gorgeous appearance makes them perfect for your Instagram feed, ensuring your friends will be craving them!
Ingredients You’ll Need
Gathering the right ingredients is crucial for the perfect Cheese Danish. Here’s what you’ll need:
- For the pastry: 1 sheet of puff pastry (thawed if frozen), 1 egg (for egg wash), and a pinch of flour (for dusting)
- For the cream cheese filling: 8 oz cream cheese (softened), 1/4 cup sugar, 1/2 tsp vanilla extract, and 1 egg yolk
- Optional toppings: Powdered sugar for dusting, fruit preserves, or lemon glaze for extra flavor
Steps to Create Your Cheese Danishes
Now that you have your ingredients, let’s get baking! Follow these simple steps to create your own Cheese Danishes:
- Step 1: Preheat and Prep: Preheat your oven to 400°F (200°C), and line a baking sheet with parchment paper.
- Step 2: Make the Filling: In a bowl, mix the softened cream cheese, sugar, vanilla extract, and egg yolk until smooth and creamy. This filling will be the star of your danish!
- Step 3: Roll Out the Dough: On a lightly floured surface, roll out your puff pastry sheet into a rectangle. Cut it into squares (about 4 inches each) to prepare for shaping.
- Step 4: Shape the Danishes: Take each square and cut a smaller square into each corner, creating flaps. Fold these flaps over the filling once added, creating a beautiful shape.
- Step 5: Add the Filling: Place a spoonful of your cream cheese mixture in the center of each Danish. Don’t be shy—make it generous!
- Step 6: Brush and Bake: Brush the edges with egg wash for a golden finish, then bake for 15-20 minutes or until golden brown.
- Step 7: Glaze and Serve: Once baked, let them cool slightly, then drizzle with a glaze or dust with powdered sugar before serving. Enjoy your masterpiece!
Pro Tips for Perfect Cheese Danishes
Want to take your Cheese Danishes to the next level? Here are some insider tips:
- Use cold pastry: Ensure your puff pastry is cold before baking for a flakier texture.
- Don’t overfill: A little filling goes a long way. Overfilling can lead to messy pastries.
- Experiment with flavors: Try adding lemon zest or almond extract to the filling for a unique twist!
- Let them cool: Allow the danishes to cool slightly before glazing to prevent it from melting off.
- Store properly: Keep leftovers in an airtight container at room temperature for up to 2 days for optimal freshness.
Common Mistakes and Troubleshooting
Even the best bakers can face challenges. Here are some common pitfalls and how to avoid them:
- Pastry not rising: This can happen if your puff pastry is too warm or if it’s been out too long during prep. Keep it chilled!
- Filling leaking: If your cheese filling leaks out, make sure to seal the edges well and don’t overfill.
- Burnt bottoms: If your danishes are browning too quickly, move them to a higher rack in the oven.
- Cheese too runny: Make sure your cream cheese is well-softened but not too warm to achieve the right consistency.
Cheese Danish Variations
Ready to mix things up? Here are some delicious variations to try:
- Fruit-filled Danishes: Add fresh berries or sliced apples to the cream cheese filling for a fruity twist.
- Chocolate Hazelnut Danishes: Swap out the cheese filling for Nutella or any chocolate spread for a decadent treat.
- Maple Pecan Danishes: Mix chopped pecans and maple syrup into the cream cheese filling for a nutty flavor.
- Savory Cheese Danishes: Replace the sweet filling with feta, spinach, and herbs for a delightful savory option!
How to Store Cheese Danishes
These danishes are best enjoyed fresh, but if you have leftovers, here’s how to store them:
- Room temperature: Keep cooled danishes in an airtight container for up to 2 days.
- Refrigeration: For longer storage, place them in the fridge for up to 5 days. Just reheat before serving!
- Freezing: These pastries can be frozen before baking. Just wrap tightly and freeze. Bake from frozen, adding a few extra minutes to the cooking time.
Frequently Asked Questions
Got questions? We’ve got answers! Here are some FAQs about making Cheese Danishes:
- Can I use other cheeses?: Absolutely! Cream cheese is classic, but mascarpone or ricotta can also work well.
- What can I use instead of puff pastry?: You can use crescent roll dough or even phyllo dough if you’re feeling adventurous!
- How do I know when they’re done?: Look for a golden-brown color and a flaky texture. They should be puffed up nicely!
- Can I make the filling ahead of time?: Yes! Prepare your filling a day in advance and store it in the fridge.
- What’s the best way to reheat them?: Reheat in a warm oven for about 5-10 minutes to maintain the flaky texture.
- Can I add spices to the filling?: Definitely! Cinnamon or nutmeg can add a lovely warmth to your cheese filling.
- How can I make these dairy-free?: Use dairy-free cream cheese and ensure your pastry is also dairy-free.
- What’s the best way to serve them?: These danishes are best served warm with a cup of coffee or tea!
Nutritional Tips and Dietary Adaptations
If you’re looking to adapt this recipe for dietary needs, here are some tips:
- Low-carb option: Substitute the puff pastry with a low-carb dough made from almond flour.
- Vegan adaptation: Use a plant-based cream cheese and plant-based puff pastry.
- Gluten-free choice: Opt for gluten-free puff pastry or make your own using gluten-free flour blends.
Essential Equipment for Baking Cheese Danishes
Here’s what you’ll need to make baking a breeze:
- Baking sheet: A lined baking sheet ensures even baking and easy cleanup.
- Parchment paper: This helps prevent sticking and burning.
- Mixing bowls: Have an assortment for mixing and combining your ingredients.
- Pastry brush: For applying the egg wash for that golden finish.
- Rolling pin: Essential for rolling out your puff pastry to the perfect thickness!
Serving Suggestions
How you serve your Cheese Danishes can add to the experience:
- With coffee or tea: Pair these pastries with your favorite hot beverage for a cozy treat.
- Brunch spread: Include them on a brunch platter alongside fresh fruits and other pastries.
- For dessert: Serve warm with a scoop of vanilla ice cream or a dollop of whipped cream!
Conclusion
And there you have it—your ultimate guide to creating stunning Cheese Danishes that are sure to impress! With their flaky pastry and luscious filling, these treats are not only a delight to eat but also a joy to share. So, gather your ingredients, unleash your creativity, and let the baking magic begin. Don’t forget to snap a pic and share your Cheese Danish moments with friends. Happy baking!

Cheese Danish Recipe
Ingredients
Method
- Preheat oven to 375°F (190°C). Roll out puff pastry and cut into squares.
- Mix cream cheese, sugar, and vanilla until smooth; spread onto pastry squares.
- Add cheese filling in the center of each square and fold edges slightly.
- Bake for 15-20 minutes until golden brown.
- Let cool slightly, then garnish with powdered sugar or fruit if desired.
Notes
Loved this recipe? Save it to your favorite Pinterest board so you can easily find it later! ✨