
Easy Homemade Chocolate Pudding Recipe: Your New Go-To Dessert!
Hey besties! Laya here, and I’m SO excited to share my absolute FAVORITE easy homemade chocolate pudding recipe with you. Forget those store-bought cups – this recipe is a game-changer. We’re talking rich, decadent, and seriously simple. If you’ve ever been looking for the perfect dessert that’s both quick and easy to make, you’ve officially found it! This chocolate pudding recipe is about to become your new obsession. Trust me; it’s THAT good. Let’s get started!
Why You’ll Love This Easy Chocolate Pudding
Seriously, what’s not to love? This isn’t just *any* chocolate pudding. It’s a hug in a bowl, a sweet escape, and a guaranteed crowd-pleaser. Here’s why this recipe will become your new best friend:
- Easy to Make: This recipe was designed for simplicity. No fancy techniques or hard-to-find ingredients.
- Quick and Delicious: From start to finish, you’re looking at less than 30 minutes. Hello, instant gratification!
- Rich and Creamy: The combination of cocoa powder and bittersweet chocolate creates a depth of flavor that’s simply irresistible.
- Customizable: Want to add a hint of spice? A splash of coffee liqueur? Go for it! This recipe is your canvas.
- Perfect for Any Occasion: Whether it’s a cozy night in or a potluck with friends, chocolate pudding is always a good idea.
Gather Your Ingredients
Okay, let’s talk ingredients. The beauty of this recipe is that you probably already have most of these in your pantry! Here’s what you’ll need:
- 1/2 cup granulated sugar: Adds sweetness and helps create that perfect pudding texture.
- 1/4 cup unsweetened cocoa powder: Provides the rich chocolate flavor we all crave.
- 3 tablespoons cornstarch: This is the thickening agent that gives the pudding its silky-smooth consistency.
- 1/4 teaspoon salt: Enhances the flavors and balances the sweetness.
- 2 1/2 cups milk: I used whole milk for the creamiest results, but you can use 2% or even non-dairy milk.
- 2 ounces bittersweet chocolate, chopped: Adds extra depth and a touch of elegance.
- 1 teaspoon vanilla extract: Enhances all the flavors and adds a warm, comforting aroma.
- 1 tablespoon butter: Contributes to the richness and adds a beautiful shine.
Step-by-Step Chocolate Pudding Recipe Instructions
Alright, let’s dive into the fun part – making the pudding! Follow these simple steps, and you’ll have a bowl of chocolatey goodness in no time.
- Combine Dry Ingredients: In a medium saucepan, whisk together the sugar, cocoa powder, cornstarch, and salt. Make sure there are no lumps!
- Add Milk: Gradually whisk in the milk until the mixture is smooth. This is crucial for preventing clumps later on.
- Cook and Thicken: Cook over medium heat, stirring constantly with a whisk, until the mixture comes to a boil and thickens. Don’t stop stirring! You don’t want the pudding to burn or stick to the bottom of the pan.
- Simmer: Reduce heat to low and cook, stirring constantly, for 1 minute more. This ensures that the cornstarch is fully cooked and the pudding is perfectly smooth.
- Add Chocolate, Vanilla, and Butter: Remove from heat and stir in the chopped bittersweet chocolate, vanilla extract, and butter until everything is melted and smooth. The butter will give the pudding a beautiful sheen.
- Pour and Chill: Pour the pudding into individual serving dishes or a bowl.
- Prevent Skin Formation: Cover the pudding with plastic wrap, pressing it directly onto the surface to prevent a skin from forming. This is a MUST!
- Refrigerate: Refrigerate for at least 2 hours before serving. This allows the pudding to fully set and develop its flavors.
Pro Tips for Perfect Pudding
Want to take your chocolate pudding to the next level? Here are a few of my favorite pro tips:
- Use a Whisk: A whisk is your best friend for ensuring a smooth and lump-free pudding.
- Stir Constantly: Don’t walk away from the stove! Constant stirring is essential for preventing burning and sticking.
- Quality Chocolate Matters: Use good-quality bittersweet chocolate for the best flavor.
- Don’t Skip the Plastic Wrap: Pressing the plastic wrap directly onto the surface of the pudding is crucial for preventing a skin from forming.
- Chill Time is Key: Be patient and allow the pudding to chill for at least 2 hours before serving. It’s worth the wait!
Common Mistakes to Avoid
Even with an easy recipe like this, there are a few common mistakes to watch out for:
- Lumpy Pudding: This usually happens when the dry ingredients aren’t properly whisked together or when the milk is added too quickly.
- Burnt Pudding: This can occur if the heat is too high or if you’re not stirring constantly.
- Skin Formation: This happens when the pudding isn’t properly covered while chilling.
- Not Thick Enough: If your pudding isn’t thickening, make sure you’re using enough cornstarch and that you’re cooking it long enough.
Delicious Variations to Try
Ready to get creative? Here are a few fun variations to spice up your chocolate pudding:
- Mexican Chocolate Pudding: Add a pinch of cinnamon and a dash of cayenne pepper for a warm and spicy kick.
- Mocha Pudding: Stir in a tablespoon of instant coffee granules for a coffee-infused delight.
- Peanut Butter Pudding: Swirl in a few tablespoons of peanut butter for a decadent and nutty treat.
- Coconut Pudding: Use coconut milk instead of regular milk for a tropical twist.
- Boozy Pudding: Add a splash of your favorite liqueur, such as Kahlua or Baileys, for an adult-friendly dessert.
How to Store Your Homemade Chocolate Pudding
Got leftovers? Lucky you! Here’s how to store your homemade chocolate pudding:
- Refrigerate: Store the pudding in an airtight container in the refrigerator for up to 3 days.
- Prevent Skin Formation: Make sure to cover the pudding with plastic wrap, pressing it directly onto the surface, to prevent a skin from forming.
- Freezing: I don’t recommend freezing chocolate pudding, as it can change the texture and make it grainy.
Frequently Asked Questions (FAQ)
- Can I use non-dairy milk? Absolutely! Almond milk, soy milk, and oat milk all work well in this recipe. Just keep in mind that the flavor and texture may be slightly different.
- Can I use a different type of chocolate? Yes! Milk chocolate or dark chocolate would both be delicious. Adjust the amount of sugar to taste.
- Can I make this recipe ahead of time? Definitely! In fact, I recommend making it at least a few hours in advance to allow it to fully chill and set.
- Why is my pudding lumpy? This usually happens when the dry ingredients aren’t properly whisked together or when the milk is added too quickly. Make sure to whisk the dry ingredients thoroughly and gradually add the milk while whisking constantly.
- Why is my pudding not thickening? Make sure you’re using enough cornstarch and that you’re cooking it long enough. If it’s still not thickening, you can try adding a little more cornstarch, but be careful not to add too much, or it will become too thick.
Serving Suggestions: Make It a Moment!
Okay, you’ve made this amazing chocolate pudding. Now, let’s make it a moment! Here are some fun serving suggestions:
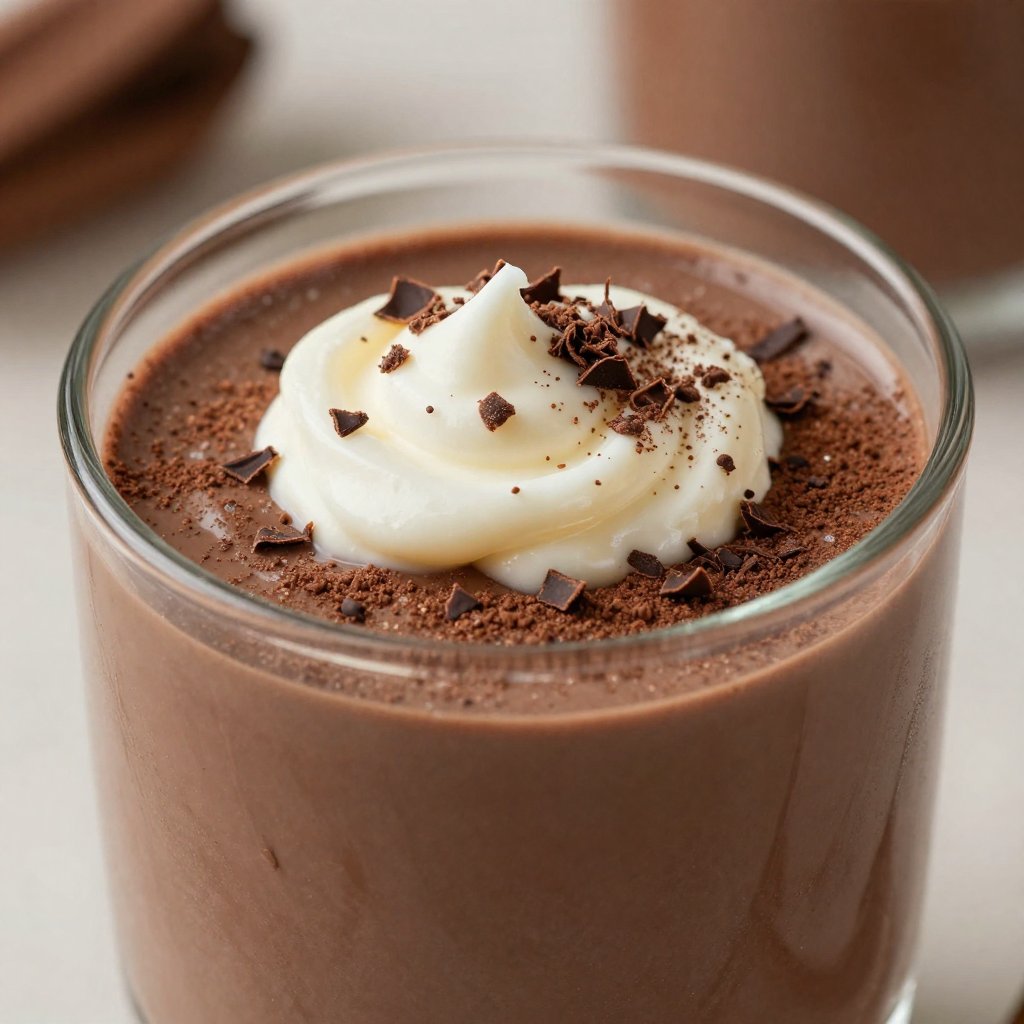
- Classic Toppings: Whipped cream, chocolate shavings, and a cherry on top are always a good idea.
- Fresh Fruit: Berries, bananas, and sliced peaches add a burst of freshness and flavor.
- Crushed Cookies: Oreos, chocolate chip cookies, or graham crackers add a fun and crunchy texture.
- Nuts: Chopped walnuts, pecans, or almonds add a nutty flavor and a satisfying crunch.
- Sauces: Caramel sauce, chocolate sauce, or raspberry sauce add an extra layer of decadence.
And because I love you guys, here are a few internal links to some other recipes you might enjoy! If you like this chocolate pudding, you’ll LOVE my gf-choc-cake. Or, for something a little different, check out my gluten-free-chocolate-cake.
Alright, my friends, that’s it for today! I hope you love this easy homemade chocolate pudding recipe as much as I do. Don’t forget to snap a pic and tag me on social media when you make it! Happy cooking! XOXO, Laya!

Homemade Chocolate Pudding
Ingredients
Method
- Whisk sugar, cocoa, cornstarch, and salt in a saucepan.
- Gradually whisk in milk until smooth.
- Cook over medium heat, stirring constantly, until boiling and thickened.
- Reduce heat and cook, stirring, for 1 minute.
- Remove from heat; stir in chocolate, vanilla, and butter until smooth.
- Pour into serving dishes.
- Cover with plastic wrap, pressing onto the surface.
- Refrigerate for at least 2 hours.